[springboot_start] thymeleaf layout 설정(작성 중)
개요
이번에는 thymeleaf 를 프로젝트에 적용하는 방법과 thymeleaf layout 을 설정하는 방법에 대해서 알아보겠습니다.
| 종류 | 환경 |
|---|---|
| OS | M1 Mac(Monterey 12.4) |
| IDE | Intellij(2022.1.2) |
| Java | jdk17 (temurin) |
Thymeleaf 환경 설정
thymeleaf 의존성 추가
build.gradle 파일에 thymleaf 의존성을 추가합니다.
dependencies {
    implementation 'org.springframework.boot:spring-boot-starter-thymeleaf'
}
thymeleaf 설정
application.yml 파일에 thymelaf 관련 항목을 설정합니다.
---
spring:
  # ...중략
  thymeleaf:
    prefix: classpath:templates/
    suffix: .html
    cache: true
    check-template-location: true
---
각 항목 해설
| 옵션 | 해설 |
|---|---|
| prefix: classpath:templates/ | thymeleaf 최상위 디렉토리를 지정합니다. Controller 에서 /resource/templates/index.html 을 return 하고 싶은 경우 return index 라고 작성하면 됩니다. |
| suffix: .html | .html 으로 설정하여 파일 확장자를 생략할 수 있습니다. |
| cache: true | 캐시 여부를 지정합니다. 개발 환경에서는 false, 운영이나 배포환경에서는 true 로 지정할 수 있도록 합니다. |
| check-template-location: true | 디렉토리에 파일이 존재하는지 체크합니다. 없다면 에러가 발생합니다. |
Thymeleaf Layout 적용
Thymeleaf Layout 는 공통적인 Header 나 Footer 등을 따로 구현하고 내용이나 구조를 필요에 따라 사용하기 위해서 필요합니다.
Thymeleaf Layout 의존성 추가
build.gralde 파일에 다음과 같은 의존성을 추가합니다. java version 이 11이상일 경우 다른 의존성을 추가해야된다는 검색결과가 있지만 저는 이상이 없었기 때문에 그대로 진행합니다.
dependencies {
    implementation 'org.springframework.boot:spring-boot-starter-thymeleaf'
    implementation 'nz.net.ultraq.thymeleaf:thymeleaf-layout-dialect'
}
thymeleaf 구성
layout 을 적용하기 위해서는 다음과 같은 요소가 필요합니다. 각 요소를 구현하는 순서는 상관없으니 참고하시길 바랍니다.
- 공통적으로 적용할 요소 (ex: common_script, footer, header, navigation)
- 필요에 따라 요소를 배치하는 layout page
- 페이지 주 내용이 들어가는 메인 페이지
공통적으로 적용할 요소 추가
먼저 공통적으로 적용할 요소를 구현해보겠습니다. /resources/templates/fragments 경로에 common_header.html 파일을 생성 후 아래와 같이 구현합니다.
<!DOCTYPE html>
<html xmlns:th="http://www.thymeleaf.org" lang="kr">
  <head th:fragment="common_header">
    <title>Title</title>
  </head>
</html>
이와 비슷하게 /resources/templates/fragments 경로에 common_footer.html 파일을 생성 후 아래와 같이 구현합니다.
<!DOCTYPE html>
<html xmlns:th="http://www.thymeleaf.org" lang="kr">
<footer th:fragment="common_footer">
© 2011 The Good Thymes Virtual Grocery
</footer>
</html>필요에 따라 요소를 배치하는 layout 추가
다음은 필요에 따라 요소를 배치할 수 있는 layout 페이지를 생성하기 위해 /resources/templates/layouts 경로에 default_layout.html 파일을 생성 후 아래와 같이 구현합니다.
<!DOCTYPE html>
<html lang="ko"
      xmlns:th="http://www.thymeleaf.org"
      xmlns:layout="http://www.ultraq.net.nz/thymeleaf/layout">
<head>
  <meta charset="UTF-8"/>
  <title>thymeleaf layout</title>
  <!-- content script -->
  <!--  <th:block layout:fragment="css"></th:block>-->
  <!-- content script -->
  <!--  <th:block layout:fragment="script"></th:block>-->
</head>
<body>
<!-- header fragment 사용 -->
<th:block th:replace="fragments/common_header :: common_header"></th:block>
<!-- content fragment 사용 -->
<th:block layout:fragment="content"></th:block>
<!-- footer fragment 사용 -->
<th:block th:replace="fragments/common_footer :: common_footer"></th:block>
</body>
</html>
layout:fragment=“content” 부분에 동적 페이지 내용이 삽입되도록 구현하였습니다.
메인 페이지 설정
마지막으로 동적 컨텐츠 페이지를 생성 후 main.html 을 다음과 같이 구현합니다.
<!DOCTYPE html>
<html xmlns="http://www.w3.org/1999/xhtml"
      xmlns:th="http://www.thymeleaf.org"
      xmlns:layout="http://www.ultraq.net.nz/thymeleaf/layout"
      layout:decorate="~{layouts/default_layout}" lang="kr">

<!-- index.html 고유 CSS 추가 -->
<!--<th:block layout:fragment="css">-->
  <!--    <link rel="stylesheet" th:href="@{/css/page/home.css}" >-->
<!--</th:block>-->
<!-- index.html 고유 스크립트 추가 -->
<!--<th:block layout:fragment="script">-->
  <!--    <script th:src="@{/js/page/home.js}"></script>-->
<!--</th:block>-->

<!-- Content -->
<div layout:fragment="content">
  <h1>Content</h1>
  <p th:text="|Hello, ${name}!|">홍김돌</p>
</div>
</html>
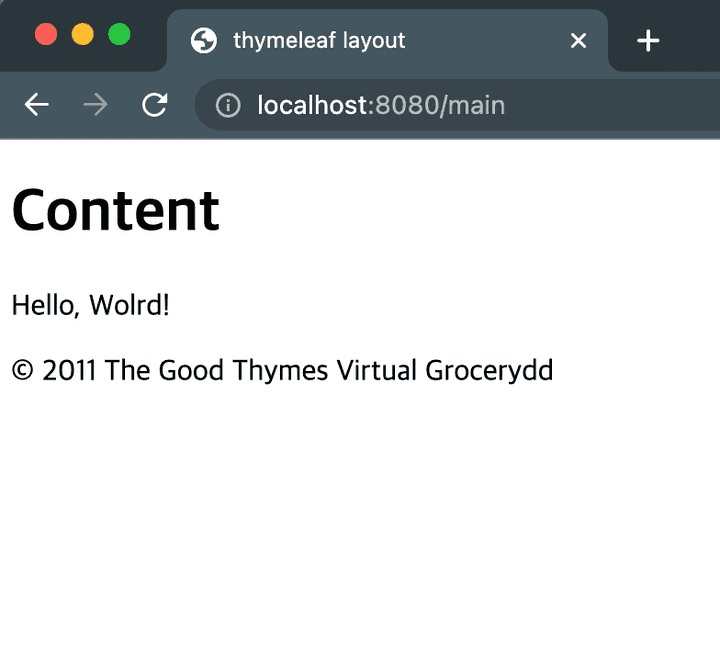
thymeleaf layout 적용 확인
샘플 페이지 생성까지 끝마쳤다면 localhost:8080/main 으로 접속하여 결과를 확인합니다.

참고
https://www.thymeleaf.org/doc/tutorials/3.0/usingthymeleaf.html